Before you attemptMy system specsSetup!Install Time!Whiskey SetupConfiguring Whiskey For Diablo 4LinksRedditGithubApple
Before you attempt
You’ll need to install a beta version of MacOS. This may cause issues. Please backup your computer.
You’ll need some basic knowledge of how to copy/paste into a terminal and a stable Internet Connection.
Difficulty: ⭐⭐⭐ / ⭐⭐⭐⭐⭐
Time: ~2 Hours
My system specs
Hardware Overview:
  Model Name:	MacBook Pro
  Model Identifier:	Mac14,5
  Model Number:	MPHG3LL/A
  Chip:	Apple M2 Max
  Total Number of Cores:	12 (8 performance and 4 efficiency)
  Memory:	32 GB
  System Firmware Version:	10151.0.82.0.1
  OS Loader Version:	10151.0.82.0.1
  Activation Lock Status:	Enabled
This tutorial should work for any Metal Macbook.
Setup!
Go to apple’s development site and download Xcode 15 Beta
You can login with any apple account. You don’t need a developer account.
(you can also uncheck the iOS 17 beta install)

Make sure you also install the Command Line Tools. I fucked this part up and it took me hours to figure out after a few failed installs down the road!

Download the Game Porting Toolkit

Install the Xcode 15 Beta on your macbook.
In
Settings → General → Software Update and then advanced settings you want to opt into the new Beta for Sonoma
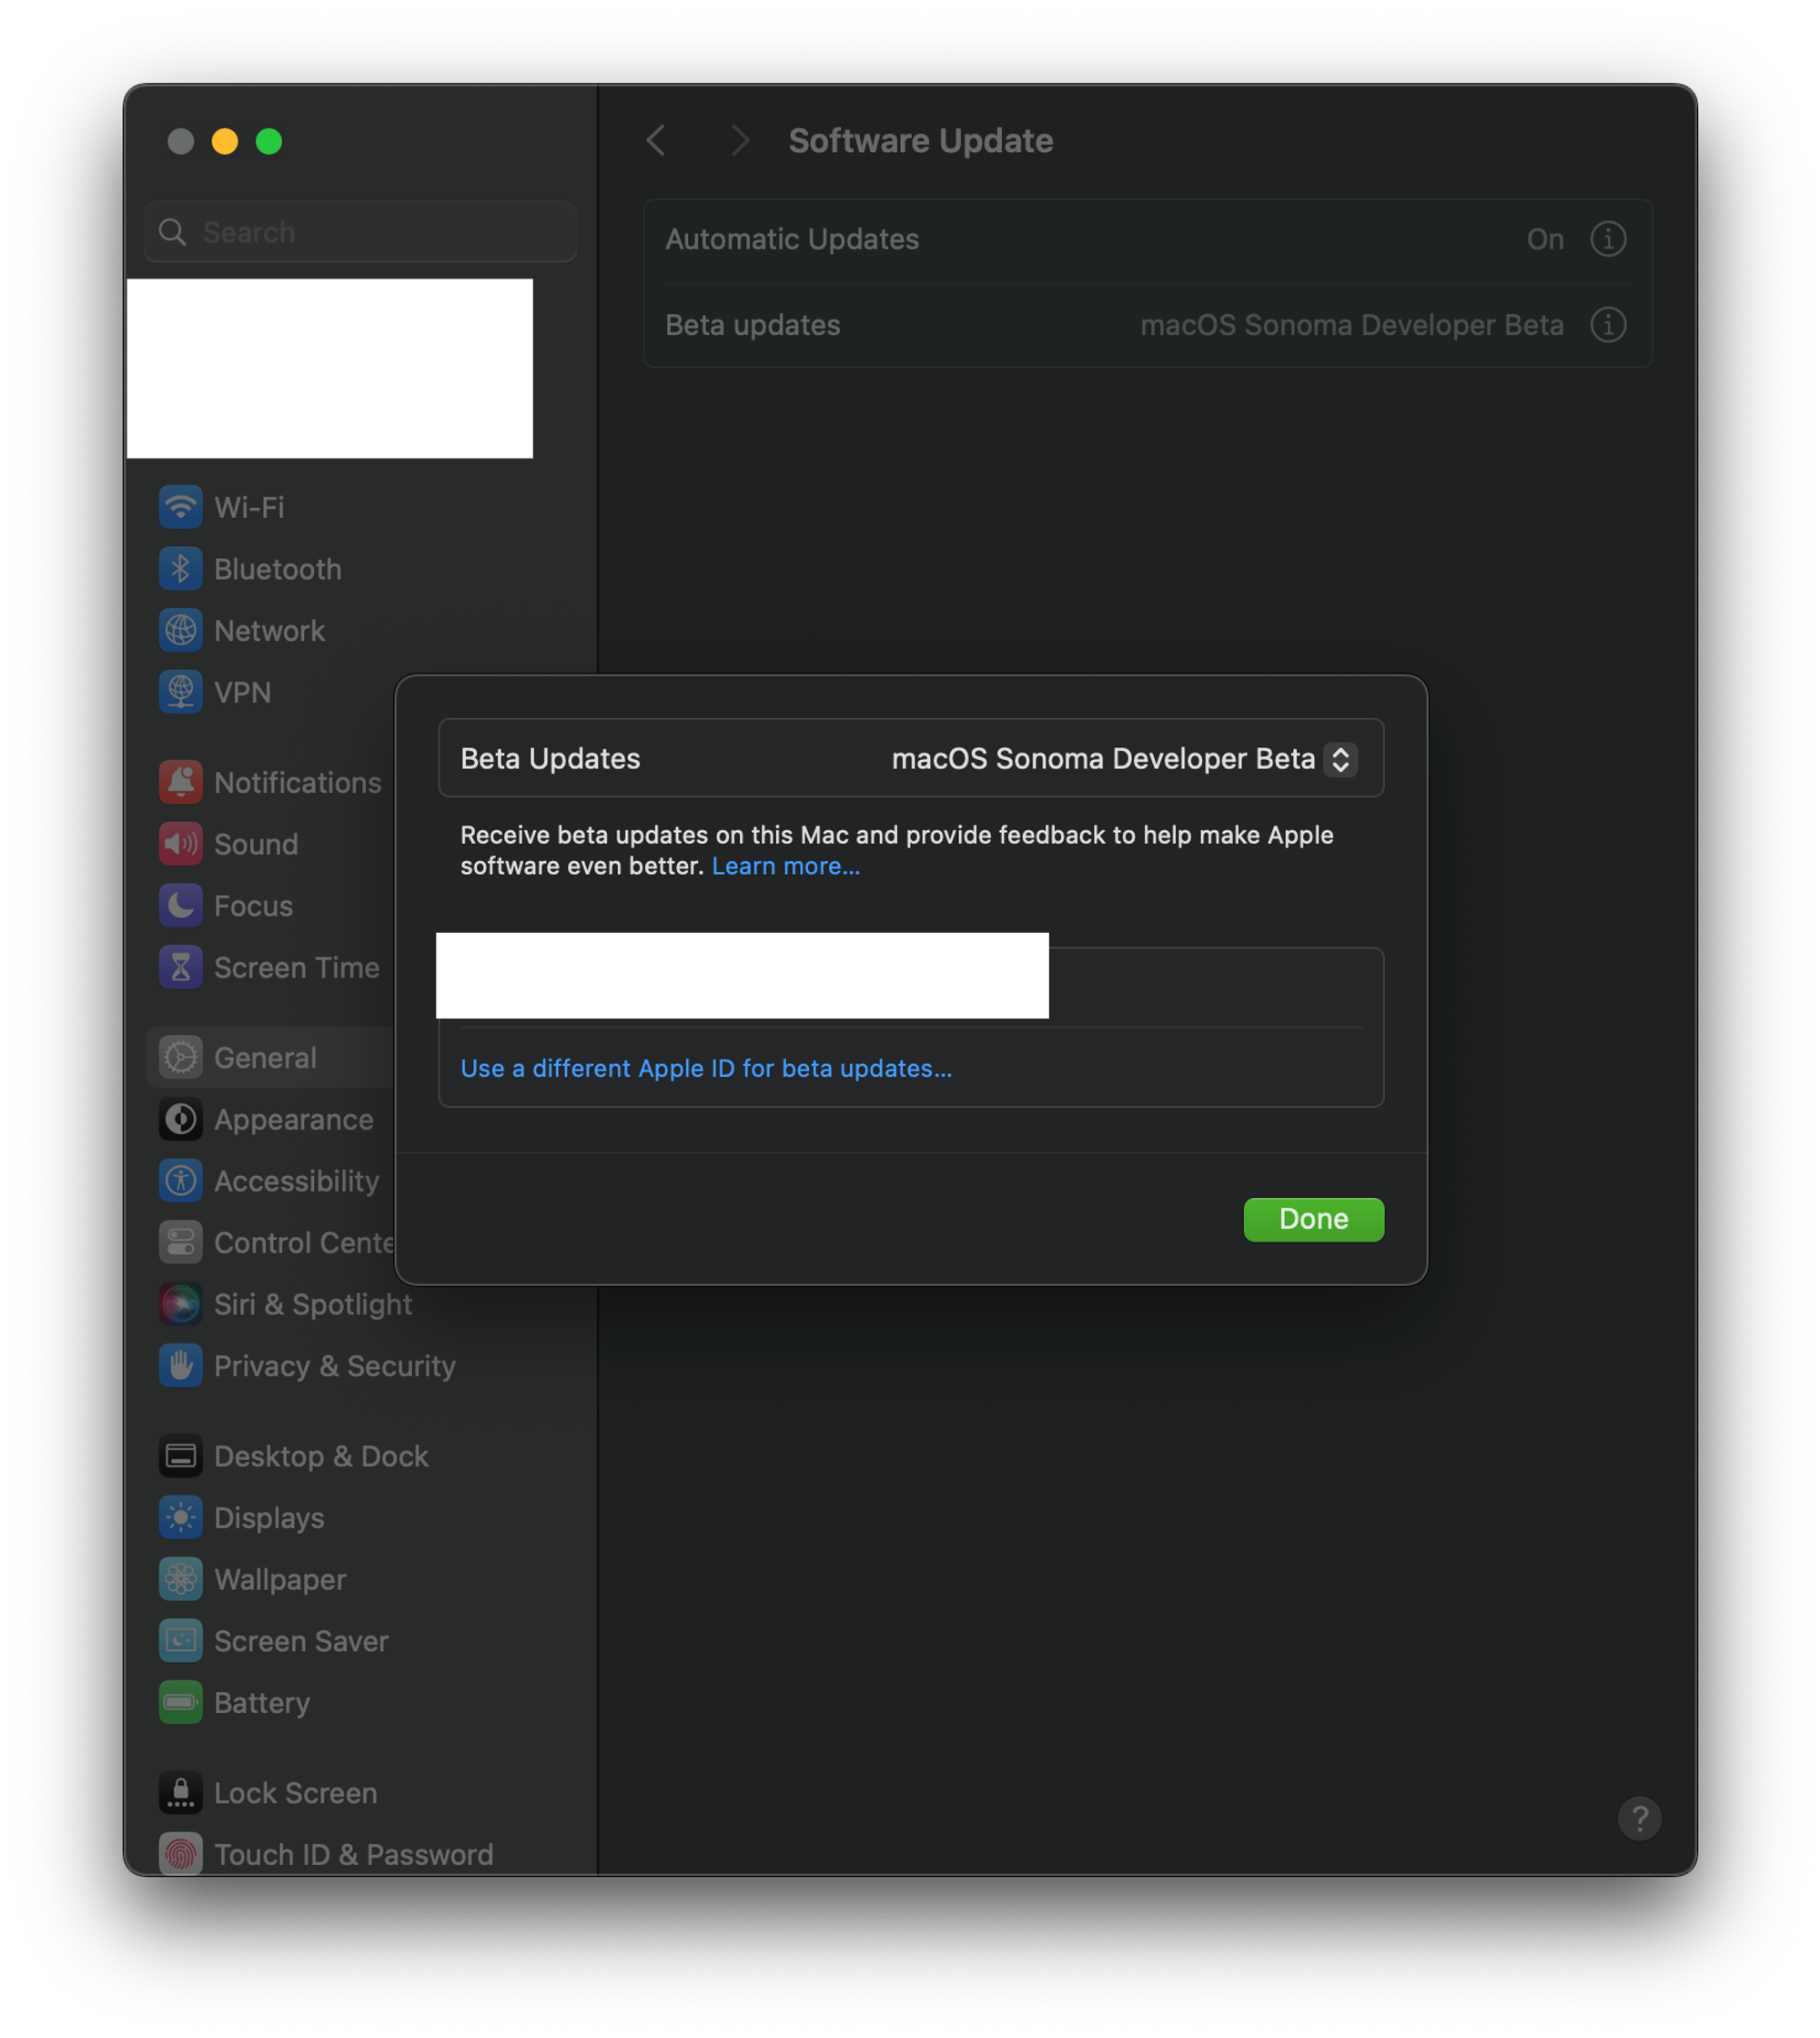
Install the new OS version, then install the new version of Xcode.
Restart.
You should get the following settings under about my mac:

Install the Xcode-Beta and the command line tools.
This should take about 15 mins if you have good internet and a more recent macbook.


- Mount the Game Porting Toolkit’s dmg and open
Read Me.rtf
Should look like this below 👇


Backup printout of the first set of instructions.
Don’t run yet, hold your horses!!! This is just here for Example!!!! Please See the next section for step-by-step instructions!!!
Installation and Setup

1. Setup your development and Homebrew environment
	•	Ensure the Command Line Tools for Xcode 15 beta are installed. Visit https://developer.apple.com/downloads to download these tools.
	•	Open Terminal.
	•	The Game Porting Toolkit runs under Rosetta 2. Ensure that Rosetta 2 is installed.
softwareupdate --install-rosetta
	•	Enter an x86_64 shell to continue the following steps in a Rosetta environment. All subsequent commands should be run within this shell.
arch -x86_64 zsh
	•	Install the x86_64 version of Homebrew if you don't already have it.
/bin/bash -c "$(curl -fsSL https://raw.githubusercontent.com/Homebrew/install/HEAD/install.sh)"
	•	Make sure the brew command is on your path:
which brew
		If this command does not print /usr/local/bin/brew, you must either modify your PATH to put /usr/local/bin first, or fully specify the path to brew in the subsequent commands.
	•	Tap the Apple Homebrew tap, which can be found at https://github.com/apple:
brew tap apple/apple http://github.com/apple/homebrew-apple
	•	Install the game-porting-toolkit formula. This formula downloads and compiles several large software projects. How long this takes will depend on the speed of your computer.
brew -v install apple/apple/game-porting-toolkit
	•	If during installation you see an error such as “Error: game-porting-toolkit: unknown or unsupported macOS version: :dunno”, your version of Homebrew doesn’t have macOS Sonoma support. Update to the latest version of Homebrew and try again.
brew update
brew -v install apple/apple/game-porting-toolkit
Install Time!
The file says to install Rosetta 2 with the following command, so pop open a new terminal and attempt this:
softwareupdate --install-rosetta
but this fails on my mac. I checked if rosetta is running with this command:
/usr/bin/pgrep -q oahd && echo Yes || echo No
and it returned
Yes so… I think I’m good…. Sometimes MacOS isn’t aware of software installed by the Software Updates app for some reason I don’t understand. Anyways…Next, open a new terminal and go into a
x86 shell with the following command. All further commands are going to be ran in this shell:
arch -x86_64 zsh
A natural terminal will be running
arm64 on Apple’s Metal. You can check this by running
uname -a in your terminal! Neat!
If you enter
arch -x86_64 zsh in your terminal window, you’ll notice this will change the output to x86_64 when you run uname -a again! How neat is that!
Now we need to Install the
x86_64 version of Homebrew if you don't already have it. This can be a pain as most users have the metal version of brew already installed. I went ahead and said fuck it and ran this inside the x86 shell:/bin/bash -c "$(curl -fsSL https://raw.githubusercontent.com/Homebrew/install/HEAD/install.sh)"
check if that shit worked by running
which brew in your terminal. If you see /usr/local/bin/brew then you’re ✨golden! ✨
AHhh fuck. It’s not the right one. Should be
/usr/local/bin/brew. Let’s see how far we can get by manually entering the PATH to brew for the next few sets of commands!
Ok… looking good… ❤️🔥
Now we need to add the tap by calling the correct brew and file path. Looks like this:
/usr/local/bin/brew tap apple/apple http://github.com/apple/homebrew-apple
WARNING! This next step (if you meet the requirements) will take A WHILE. If you plan on going somewhere or need to interrupt the process, I don’t recommend starting this part.
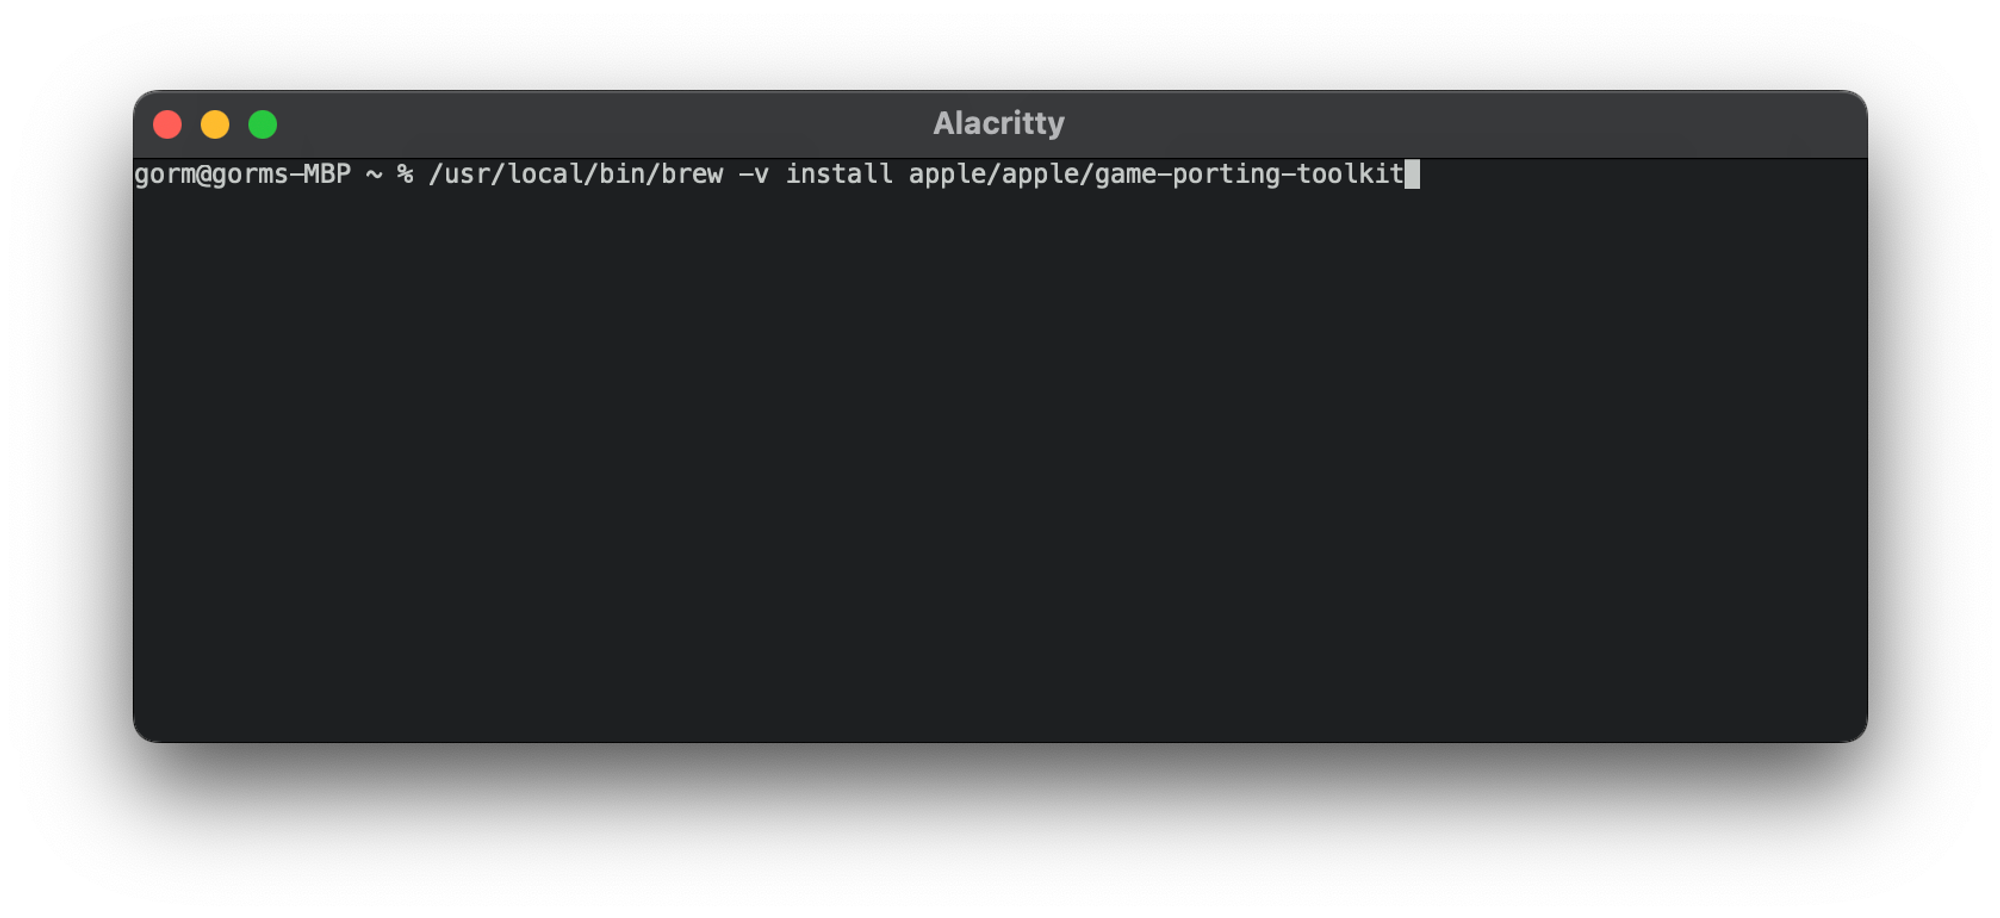
Okay, now let’s install the next steps in the same terminal where we switched to
x86_64:/usr/local/bin/brew -v install apple/apple/game-porting-toolkit
The instructions have the following text:
If during installation you see an error such as “Error: game-porting-toolkit: unknown or unsupported macOS version: :dunno”, your version of Homebrew doesn’t have macOS Sonoma support. Update to the latest version of Homebrew and try again.
I didn’t have this issue, but if you do try the following (fixed bash paths):
/usr/local/bin/brew update
/usr/local/bin/brew -v install apple/apple/game-porting-toolkit
If you get this error at this step that looks like this 👇

Then you installed xcode 15 or the command line tools before upgrading your OS… No worries though, go ahead and install it from the downloads you did earlier, then rerun the previous step in the terminal. It shouldn’t have to download everything twice, but it will take some time to check all the hashes to make sure the installers are valid from the brew tap. If you still get this error, try opening a new terminal (command + N) and then reactivating the
x86 terminal with arch -x86_64 zsh and trying the install again with /usr/local/bin/brew -v install apple/apple/game-porting-toolkit
AS A LAST RESORT YOU CAN REMOVE COMMAND LINE TOOLS AND TRY REINSTALLING FROM THE APPLE DEVELOPER DOWNLOADS.If successful, you should see a ton of garbage filling the terminal as it installs this bullshit 👇

Just let this process finish on it’s own! Don’t close the window or shutdown your mac.

Yay! Looks like it’s finished installing! On my
M2 Max it took :Size:
1.2GB Time:
22 mins 44 seconds Whiskey Setup
Download and install Whiskey from github’s releases section:


Unzip the app and then move it to your
Applications Directory.In
Finder right click on the icon for whiskey and select Open
Next, you’re going to Drag and Drop the Game Porting Toolkit’s
DMG file you downloaded into the window as prompted.
You should end up with a window like this:

Go ahead and click the ➕ in the top right corner. Create a new Container for the Battle . net program.

Now
quit the program with cmd + q and re-launch WhiskeyYou should see something like this:

Download the Windows Battle.net installer from the bookmark below 👇


Now go back to Whiskey and click on the
info panel for the container we just made
Now you want to right click on the
Path it gave you and copy it
Now go back to your terminal and you’re going to
mv (move) the Install we just downloaded into that Path you copied. You can do that like this:cp Downloads/Battle.net-Setup.exe /Users/{your_user}/Library/Containers/com.isaacmarovitz.Whisky/Bottles/Battle.net
Make sure to replace the values! This is an example!
Now in Whiskey, you’re going to go back to the main menu and click on
Run in the bottom right corner:
Select the Installer and double-click on it. It should launch as if you’re running windows. Go ahead and install with the recommended settings. Once finished you’ll have the Login screen like so:

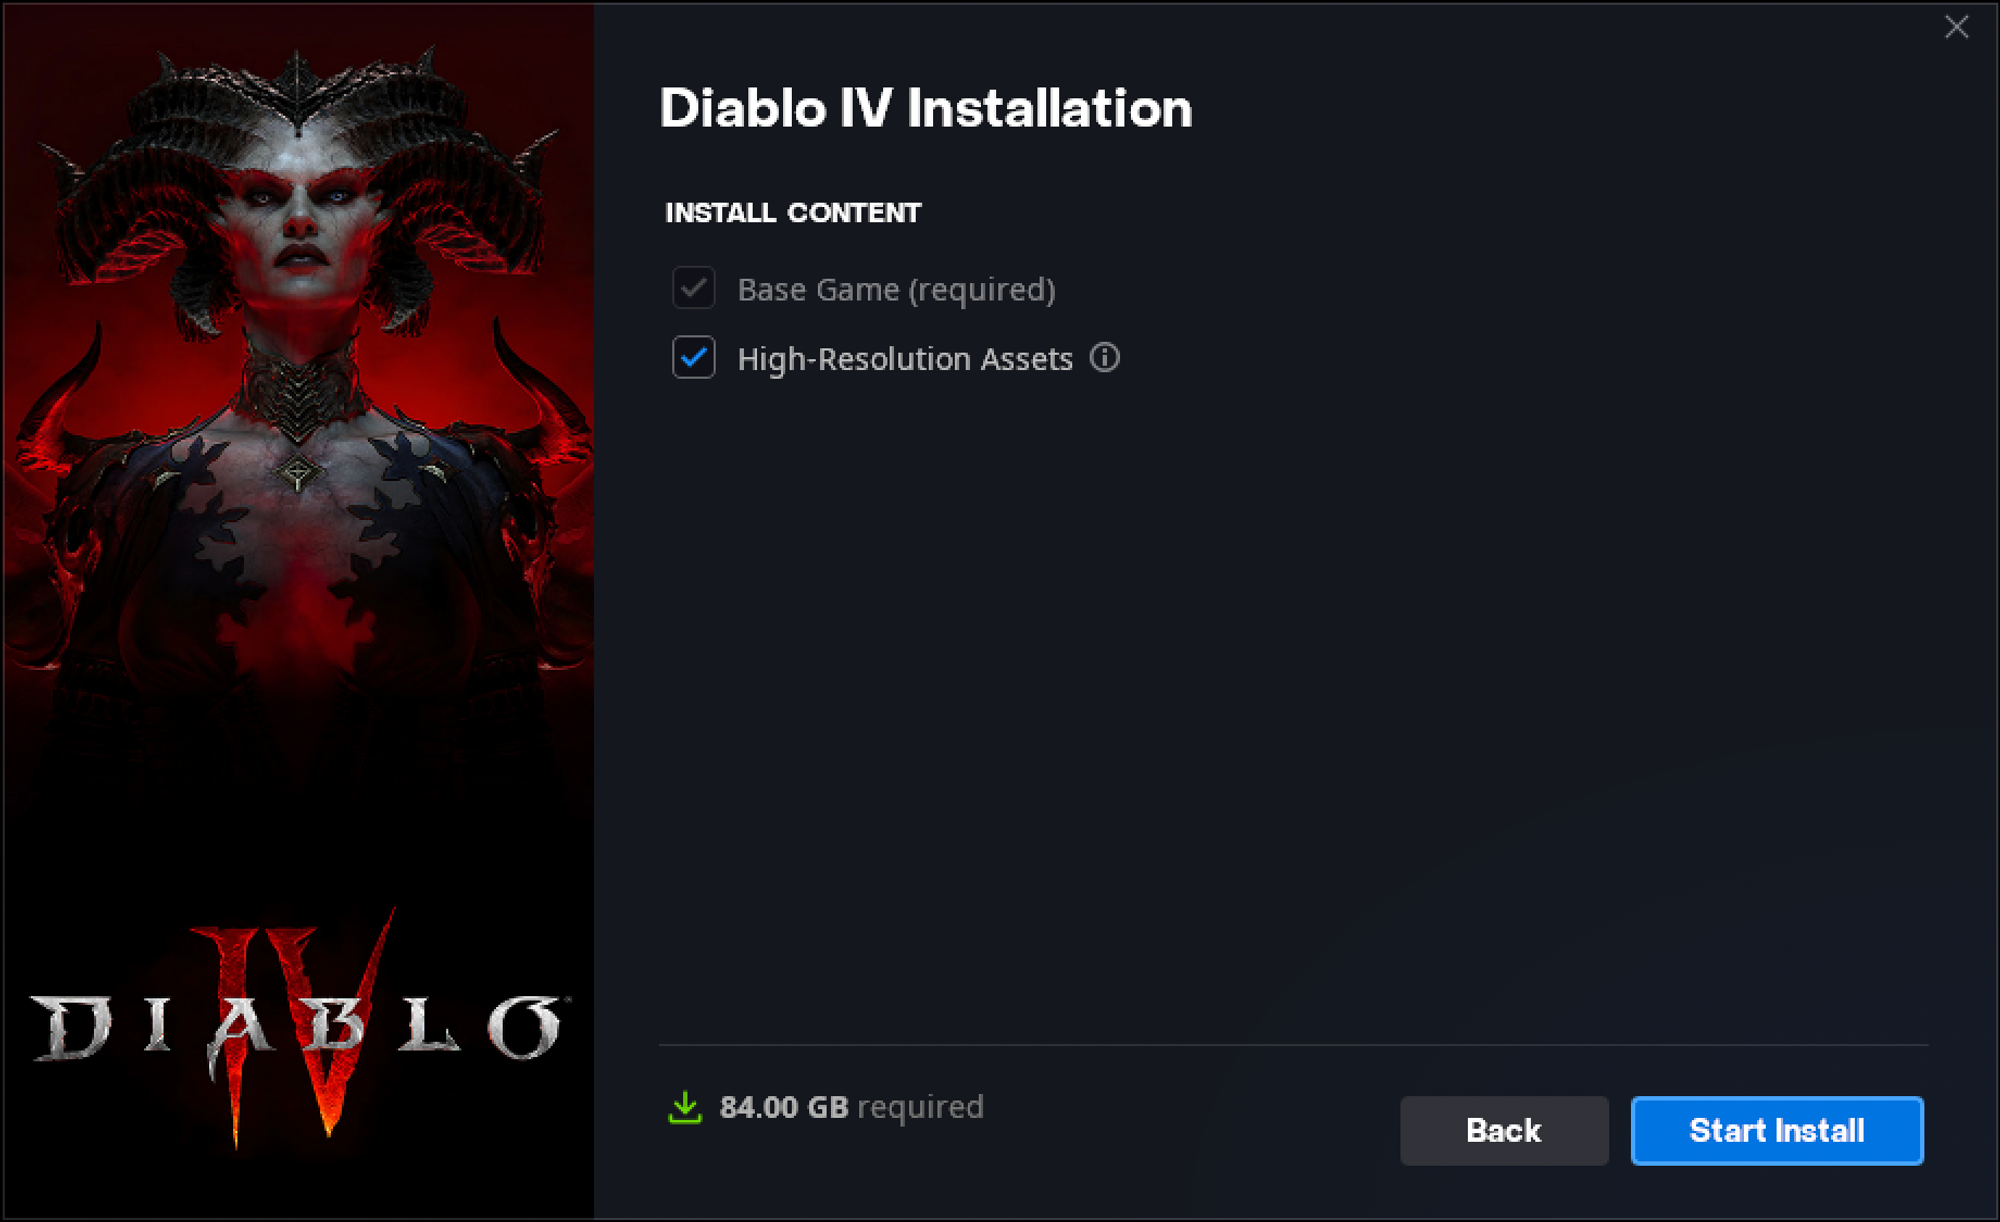
Now navigate to Diablo 4 and install it


Configuring Whiskey For Diablo 4
To get Diablo 4 to actually run you’ll need to update a few settings.
- Navigate to the Config Panel for your Container and turn on
Esync
- Then you’ll need to click on
Open Registry Editor

Inside the Registry Editor you’ll need to navigate to:
HKEY_LOCAL_MACHINE/Software/Microsoft/Windows NT/CurrentVersion
Now you’ll set the value of
CurrentBuild and CurrentBuildNumber to 19042 - which is the minimum version you can actually run diablo 4 on. See screenshot below 👇
Now Restart Whiskey, close any open programs, and navigate to
Programs
Then
Diablo IV Launcher.exe 
and click
Run
If none of the above works, you can try setting this field in the config and manually entering the version number like so:

This may take some tinkering to get started, but that’s all the setup involved! Enjoy! Thanks for following along!

Feel free to leave feedback or a comment for me!
I love random emails from people reading my blog posts!
gorm@stream.fan


